EnLighten
With this, I’ve changed three times my idea. Finally, I’ve found something which responses to my wishes. Every idea has had a physical phenomenon involved: waves, light refraction and reflection, mirrors, fluids dynamics, inertia, etc. I realized this is not a new trend in my preferences, being that since I was a kid I encouraged myself in using practical experiments to understand concepts. Concepts => Practical uses => Interactive solutions.
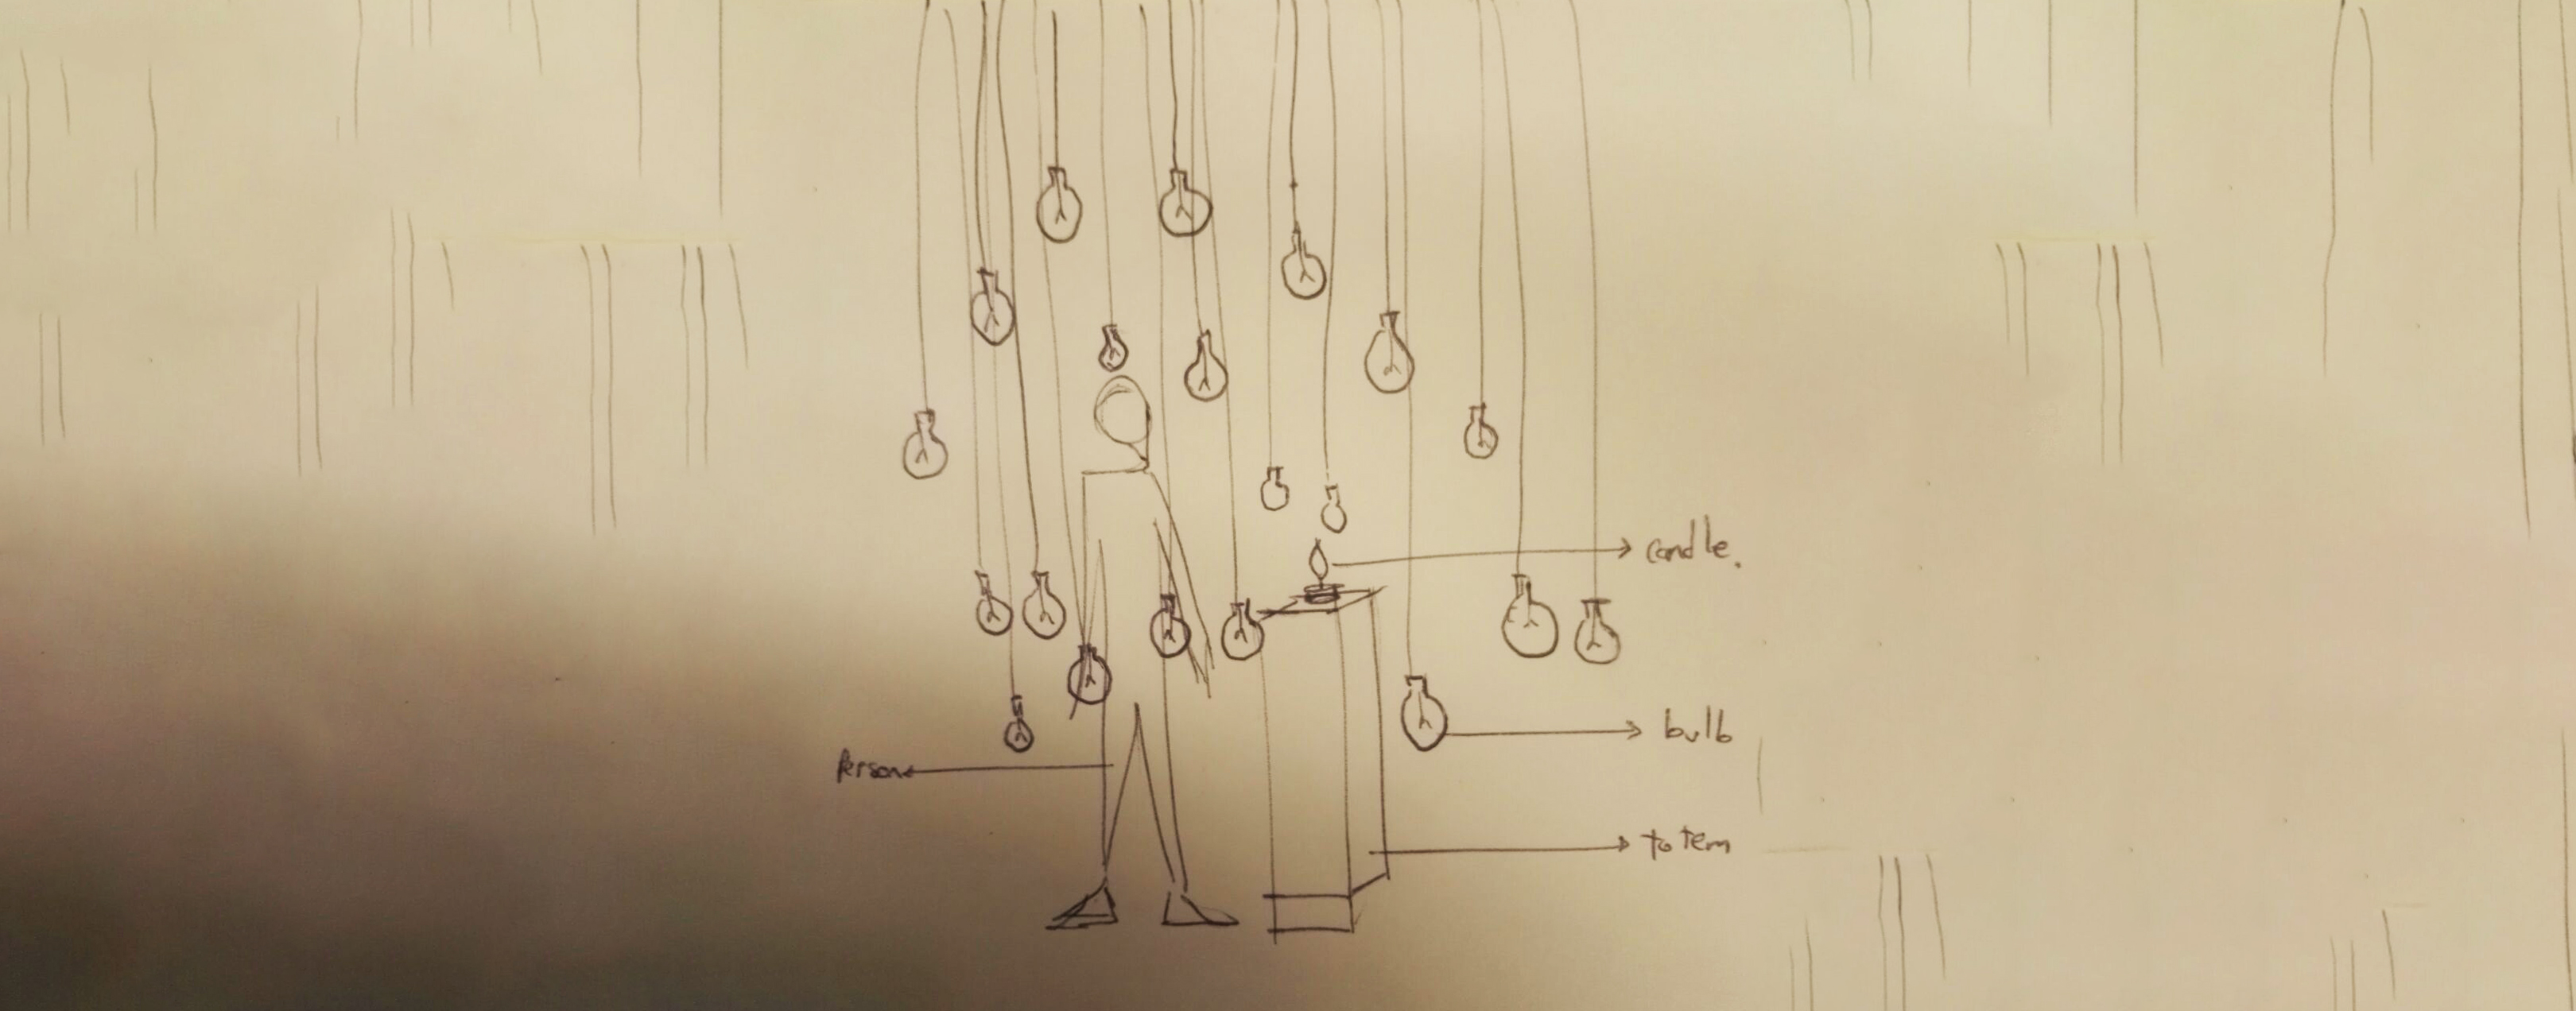
EnLighten studies the fire as a fluid and allow us play with its movement in a secure way. Technically speaking, I’ve been interested in getting out from the 3.3 - 12 volts provided by the arduino and other microcontroller boards, making bigger installations as well. Unfortunately, these wishes make everything more expensive because of quality and quantity of materials. As a first experiment with these kind of projects (talking about current and size) I will work with bulbs (domestic and cheapy elements) in order to visualize the flame’s behaviour.
This elements together suggest the idea of tempeture, light and image measurement and deployment. However, the mystism and romaticism implied in the fire is huge and I dont want to screw up it. That’s why the tech part should be almost invisible taking advantage of the fire’s dynamic as an input. In other words I will measure the fire’s intensity, direction, state and size in order to generate related outputs. How many interactions are we able to have with a single flame?. Let’s remove the buttons, sliders, levers, handle interfaces created for the human being when there are so many organic interfaces we can take advantage of, meanwhile, we may end up amplifying their feedback.
What do I want to produce in the people?: I want them to perceive the fire from other perspectives and play around it in some other ways they, we have forgotten.
Installation
BOMs - Bill of Materials
I will use 8-16 bulbs. Unfortunately it is impossible to dimmer and control brighness with just a relay. A much complex circuit is needed. Thanks to diy_bloke and his tutorial Arduino Controlled Light Dimmer. These are the materials in order to control ONE BULB, but the problem now is that if I want to control 16 bulbs I will have to build up 16 boards from scratch which rise the chances of error and we dont want that, being that we are controlling AC Current. Besides, there are some triacs which are deprecated and they should be swapped by other components and I dont have the background to take this kind of decision (hope one day I will).
So I found this beauty board 8 Channel Digital Ac Programmable Light Dimmer Module Controller Board Arduino Raspberry Compatible 50/60hz 110V, 220V IOT. That solved, we start our first testes with AC Current.
- 8 Channel Digital Ac Dimmer —— US 70
- 8 Bulbs —————————US 16
- 8 Bulbs plug ———————–US 10
- 10 Meters of electrical Cable —– US 10
- 4 Photoresistors —————— US 5
- Arduino UNO ———————– US 25
- 1 Candle —————————US 2
- Acrylic to make the enclosure ——US 20
- Total: US 158
Action plan - Dates
- Nov 20 - 24 —————————–
- Circuit Schematic. Ports budget.
- Construction one Bulb AC Dimmer and testing with arduino software
- Buy all materials
- Nov 27 - Dic 1 —————————–
- AC load testing 20 bulbs = what voltage / what current?
- Build 20 different AC bulbs?. DC Controller and Piezo installation
- Dic 4 - 8 —————————–
- Bulding 3D model - bulbs as a pixels.
- Flame analysis.
- Get scenography.
- Location definition.
- Final documentation
- Dic 11 —————————–
- Final presentation.